Compressing a website’s image files is one of the quickest and easiest ways to make that site load faster for users. Join us as we explore a new tool that could make the compression process more effective and accessible than ever: Squoosh.app. Want to know more? Check out our review of the Squoosh App on The Digital Marketing Podcast
What is Squoosh?
“Squoosh is an image compression web app that allows you to dive into the advanced options provided by various image compressors.” – Squoosh README on GitHub
In other words, Squoosh is a greatest hits compilation of image compressor features. It packs various image processing settings into a refreshingly accessible, free-to-use application that runs in your browser window, allowing you to preview the effects of different compression actions in real-time. At the time of writing, you can use Squoosh by loading its webpage (https://squoosh.app) on any of the major web browsers.
Squoosh is an experimental, open-source development project run by the GoogleChromeLabs team on GitHub.
How to use Squoosh to compress your image files
Compressing image files on Squoosh can be exceptionally quick and easy, or highly thorough and precise. That depends on how much time you are willing to spend playing with its settings. Whichever approach you take, the process is broadly the same – so let’s walk through it.
Here’s what you should see when you load the Squoosh webpage in our browser:
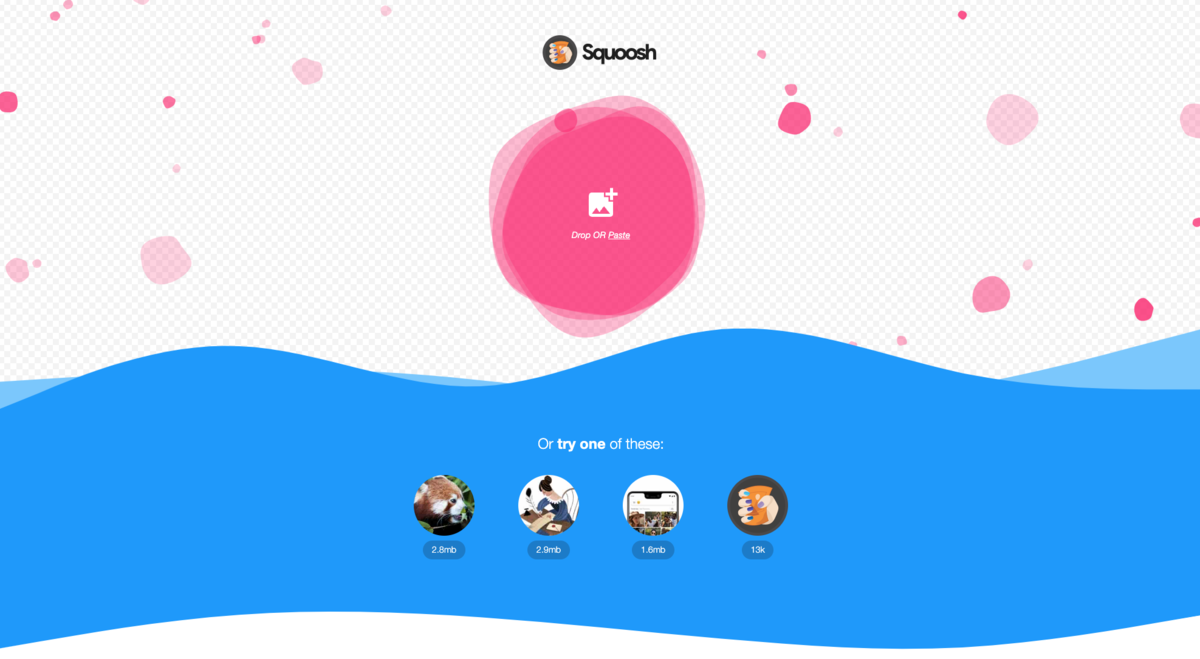
Note the prompt to drag-and-drop image files, and the text link enabling you to select an image from your computer. Choose an image file and upload it using whichever of the two methods you prefer.

This is how Squoosh looks once an image file has been uploaded.
At the centre of the screen is a slider, which can be dragged left and right. This is for comparison of how the image looks before and after compression. So, if we were to drag it fully to the left, we’d see how the full image will look after compression; and if we were to drag it fully to the right we’d see the original image.
The view shown to the left and right of the slider can be changed in real time by tweaking the compression settings to the bottom-left and bottom-right – we’ll talk about those soon.
We can also replace the original image view on the left with another compression type, which helps a great deal with deciding which settings to use.
Here’s what happens to our test image when we use the compression settings on the right-hand side to reduce the image’s colour palette from 256 to 2:

Please note that if this image was going to be used on our website, we would use far milder compression settings – we’re using extreme examples here to make obvious the differences between our images and illustrate how you can play around with multiple settings and preview the output all on the same screen.
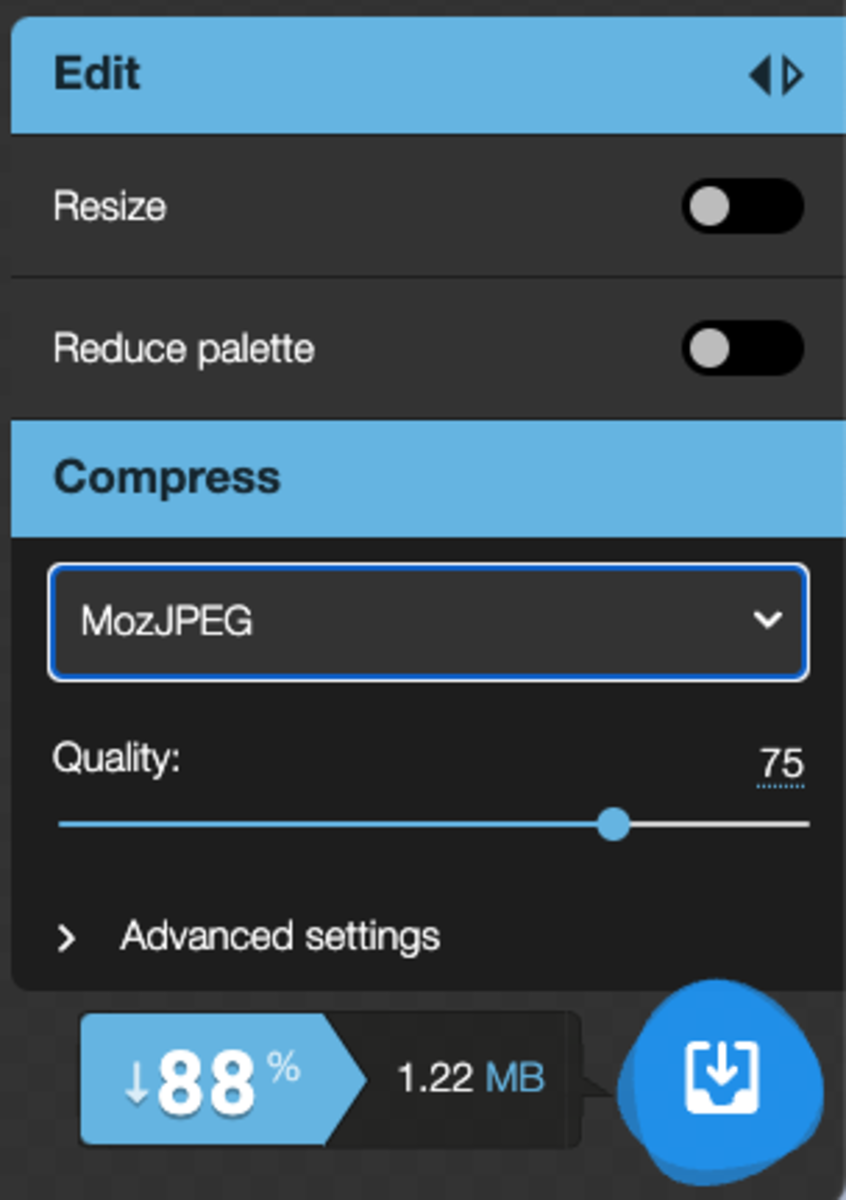
You may have noticed towards the bottom corners of these screenshots that Squoosh provides a real-time measure of how large your compressed image file will be, based on the settings you have chosen. Not only that, it also tells you the % size difference between your image variants.
Keep an eye on these stats while you tweak the compression settings, as this will help you get your image file size down as far as possible, without having too much of a negative effect on the image itself. You can zoom in on the image at any point to see the difference close-up.
We got our test image down from 9.83MB to 1.22MB – a drop of 88% – by making a few simple tweaks:
Yes, there’s a difference in sharpness – but in our eyes the image is still useable, despite the fact it has been greatly compressed.
Once you’re happy you have saved as much data as your image will allow, click the download icon in the relevant bottom corner of the screen.
Exploring Squoosh’s compression settings
In order to achieve the best possible ratio of image quality to file size, we’d recommend looking into a few of Squoosh’s more advanced settings.
First and foremost, have you chosen the best compression type for the image in question? We consider these three options the most useful.
- OptiPNG – converts PNG, BMP GIF, PNM and TIFF to optimised PNG.
- MozJPEG – converts JPG, TARGA, BMP and PPM to optimised JPEG.
- WebP – converts to optimised WebP, a new image format which uses predictive coding to reduce the amount of code needed to make up an image. ( We have a bit more to say about this image format at the end of this article as it’s a bit of a special case!)
Each compression type and image format has its strengths and weaknesses, which will play out differently from image-to-image. The type of image you have will largely dictate the best format for that image online. Graphical and line art type drawings and illustrations are usually best compressed using the PNG or GIF formats and respond well to reducing the number of colours as unlike photos they often do not need thousands of colours to render the image in an acceptable way. High resolution photographic images are best compressed using the Moz JPEG compression format and compressed using the compression slider.
Other Squoosh settings worth playing with include:
- Reduce palette – could your image make do with fewer colours? Often this is an easy win on a graphic or illustration which doesn’t require thousands of colours to display well. Reducing colour pallete on photographic images makes very little difference so try to save this for illustrations which obviously only use few colours.
- Resize – make your image and file significantly smaller at a stroke by reducing its physical dimensions. The images dimensions will visibly shrink in size, but with that the digital storage space it takes up in K or MB also shrinks. Try to resize your images to the dimensions you will be using them online. There is no need to have a 3000 pixel wide image if the place for your image on the site only displays 1800 pixels width. Trim to fit. ( Please note: some websites are set up so you upload a high resolution image and it does all the resizing for you so if you aren’t sure how yours works talk to your web developer and find out before you start making changes!)
- Quality – the simplest way to cut data. How low can you go? Keep a close eye on areas with fine detail, like eye areas, teeth and fingers as these will typically which will show the tell tale signs of over compression degradation first. We found most photographic images work great at 80% compression but some images can go a lot lower. Play around and find what works.

What is the purpose of compressing image files?
Everyone likes the websites they visit to load quickly – but unfortunately this is not always the experience we get.
Assuming your internet connection is good, the likeliest cause of a website loading slowly is that the site is made up of more data than your device can process quickly. That data will include everything that makes the website what it is, including copy, JavaScript, and yes, images.
It’s great that websites today tend to be as rich in content and functionalities as they are, but this comes at a cost in terms of both data use and its evil twin, loading speed. Average Web page file sizes have been steadily growing by 16% year on year size 2011 according to Speedcurve.com with an average total page size prediction of 4MB by 2019. Although there is quite a lot more to user experience than purely page size there can be no doubt that the larger the amount of data your page requires to download, the slower it will essentially be on a mobile device using slower mobile network data connections. We would therefore recommend bucking that page size growth trend to offer more optimised performance for mobile users who are likely to be your sites biggest audience.
On most slow-loading sites, images create a large proportion of the data surplus. This is where image compression can help.
By reducing the amount of data in an image file, compression can decrease the amount of data needed to make up a webpage. This results in smaller webpages, faster loading speeds, happier visitors and better visibility in search results (read about how Google factors page speed into search rankings).
Research by Kinsta shows that 74% of people would leave a website if it doesn’t load within 5 seconds. Compressing your image files is one of the surest and simplest ways to prevent your site from getting anywhere near a situation like that.
Key pros and cons of Squoosh
Squoosh is by no means the only free image compressor available, but based on our experience, it is one of the best. Here’s what we love about it:
- The user interface. Comparing different types of compression side-by-side using the preview slider helps find the sweet spot between low file size and sufficient image quality.
- It respects your privacy. The only data sent back to server are basic visit data and image file sizes before and after compression. We know this because it’s right there in the Squoosh README on GitHub. If we were talking about a closed-source application it would be harder to tell what happens to images and data after use.
- Seeing the effect of your tweaks in real-time. Getting an in-editor read on original size versus edited size, plus a percentage measure of compression, is extremely handy.
- You’ve got nothing to lose! Squoosh is completely free, so why not give it a go?
As you may have gathered, we’re big fans of Squoosh. However, it does have one big drawback, in that it only can only process one image at a time.
Individually processing images through Squoosh is manageable for webmasters who add images to their sites at a modest pace – but not so much so for those who need to upload lots of images daily, such as big ecommerce sites.
If that sounds like you, you’d be better off using an alternative solution for automated compression during upload of images to your website’s content management system (CMS), or failing that, batch compression before upload.
Why has Google developed Squoosh as a free, open-source project?
It’s no secret Google likes websites to load fast. In fact, sitespeed (that’s the average loading speed taken from a sample of a website’s pages) is a determiner of how much visibility a website will have in Google search results.
The indexed internet is basically Google’s product from the average web user’s perspective – so of course they’re going to want the content they serve to work as well as possible.
Squoosh is a new way for webmasters to ensure their site provides a good experience, which is great for them, their visitors, and of course, Google.
Understanding Lossy and Lossless compression
It is worth at this point for us to explore two different approaches to file compression. Lossy and Lossless. Different file formats make use of slightly different approaches to how they go about squashing down your image sizes.
Lossy compression is what the majority of web based image formats work with. The file size is reduced and the image compressed by removing additional information in the file that won’t necessarily be detected visibly by the human eye. That can be information relating to the number of colours being displayed in the image, or it can be applied to similarly shaded areas within the image. To draw on an analogy of packing a suitcase, you make more space by removing a few smaller and unnecessary items. Perhaps packing a few outfits that can be interchanged with each other to create new looks rather than trying to cram in an entirely separate outfit for each day of your trip. When a lossy format compressed image is over compressed then you will of course notice the loss of this information as the details within the image begin to fall apart and look a bit baggy or saggy. Jpeg and GIF image file formats are both examples of lossy image formats.
Lossless image compression on the other hand reduces the file size in other clever ways, focusing more on how the information required to display the video is arranged so it takes up less space. In a lossless compression format all the original information about the image is retained within the file, but it’s just stored in a more efficient way so it doesn’t take up as much space. It’s a little like packing your suitcase with your clothing rolled up.
How does Lossless image compression work?
Images take up a vast amount of data. Depending on the type of colour graphic used, it’s normal for an image file to use up 24 bits to describe the colour of each individual pixel. Multiply that by a run-of-the-mill image size (say, 900 x 900), and there you have an equation for one hefty file.
As this might suggest, image files tend not to store information as efficiently as they could. Image compressors exploit this by identifying aspects of an image that can be represented with less information. For example, if the same colour recurs in many of an image’s pixels, a compression application can replace the 8-bit code used to represent that colour with a shorter binary code.
So, 76543210 becomes 01, which saves on the number of bits required every time the relevant colour recurs.
Although this might sound like the perfect way to compress images, it has one significant draw back. In most cases the image files produced will still be a lot larger than their equivalent in a lossy format such as Jpeg or GIF. You get a lot more space but end up taking everything you wanted with you. PNG, TIFF and RAW image formats are all examples of lossless image file formats.
WebP- Almost the perfect hybrid
WebP is a new image compression file format developed by Google for online image delivery. What is special about WebP is that unlike image file formats that came before it, it is able to make use of both Lossy and lossless Image compression. As a result it can typically produce even smaller file sizes. Google cites that ‘WebP lossless images are 26% smaller in size compared to PNGs. WebP lossy images are 25-34% smaller than comparable JPEG images at equivalent SSIM quality index.’ Google Developers, 2018. Unlike the Jpeg format, WebP also supports transparency and animations within an image which is great for making use of for more creative website layouts.
It’s a fantastic format in terms of speed and delivery bar one small glitch… Not all the major browsers support the file format yet. Only around 70% of current web browser’s support or have plans to shortly support this new format but support for it is growing.
In October 2018 Microsoft edge started supporting the file format and Mozilla announced they are working on implementing support for the file format in Firefox. That’s just leaves Apple’s Safari with no known timeline for support. To make use of this format your HTML will need to be set up to include a failsafe PNG or JPEG file so the image can be displayed in older browsers or browsers who don’t yet support the new faster and frankly slicker standard. You can read more about this technique here.
We hope that gives you a sense of how compression works, but we would strongly recommend looking to a specialist resource if you want to understand the subject fully.
Computer scientist Guillermo Sapiro explains the theory behind image processing in fascinating detail in this series of video tutorials.
Now, if you’ll excuse us, we’re going to set to work on Squooshing our images and speeding up our site.